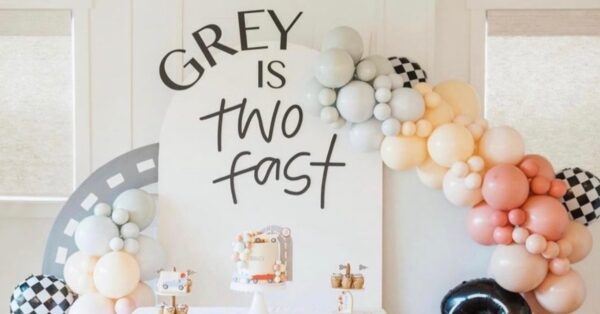
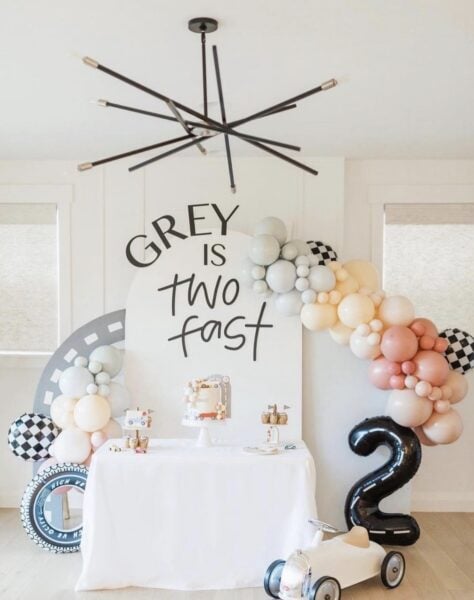
Balloons are our favorite. We love seeing them everywhere from backyard BBQ’s to international trade shows. Balloons are one of those design elements that when done correctly, they can really blow you away. In contrast, if they’re thrown up messily, they can deflate even the cutest of themes. All puns aside, whether you’re hiring a balloon stylist or trying your hand at a DIY garland, we want to make sure all your balloons are poppin’…in the best way, of course! Let’s give you some basic how-to’s, as well as tips and tricks on colors, styling, and more!
Choosing Colors
For the sake of this blog, we are going to go ahead and say that you are planning a personal event and you already have a theme chosen. Even if you have a theme, that doesn’t necessarily mean you’re sold on a color scheme. Color options are infinite. Gone are the days of only red and green for Christmas. A race car theme can be pink, black and white, while a Halloween theme can consist entirely of neutral tones. Although we love the individuality of today’s modern design, with so many choices it can feel a bit overwhelming. Pull up a chair and let us help you out!
You’d be surprised how much we emotionally connect with colors. We always strive to pull out hues that speak to our clients. What do you lean towards in your wardrobe? When you see something beautiful, do you find it’s often a common shade for you? What kind of feeling do you want to portray at your event? From there, work on finding the colors that ultimately reflect you and the vibe you’re going for.
With that said, there is a basic guideline many people like to follow. For example, blues tend to be calming, yellows are considered the cheerful colors, and reds tend to lean toward intimacy, strength or passion. Ooh-la-la! Once you’ve established your primary color, the rest may come to you more easily. From there, you can choose a color palette scheme such as monochromatic, analog, or complementary.
Psst! We love Coolors.com for this task!
Balloon Design Styles
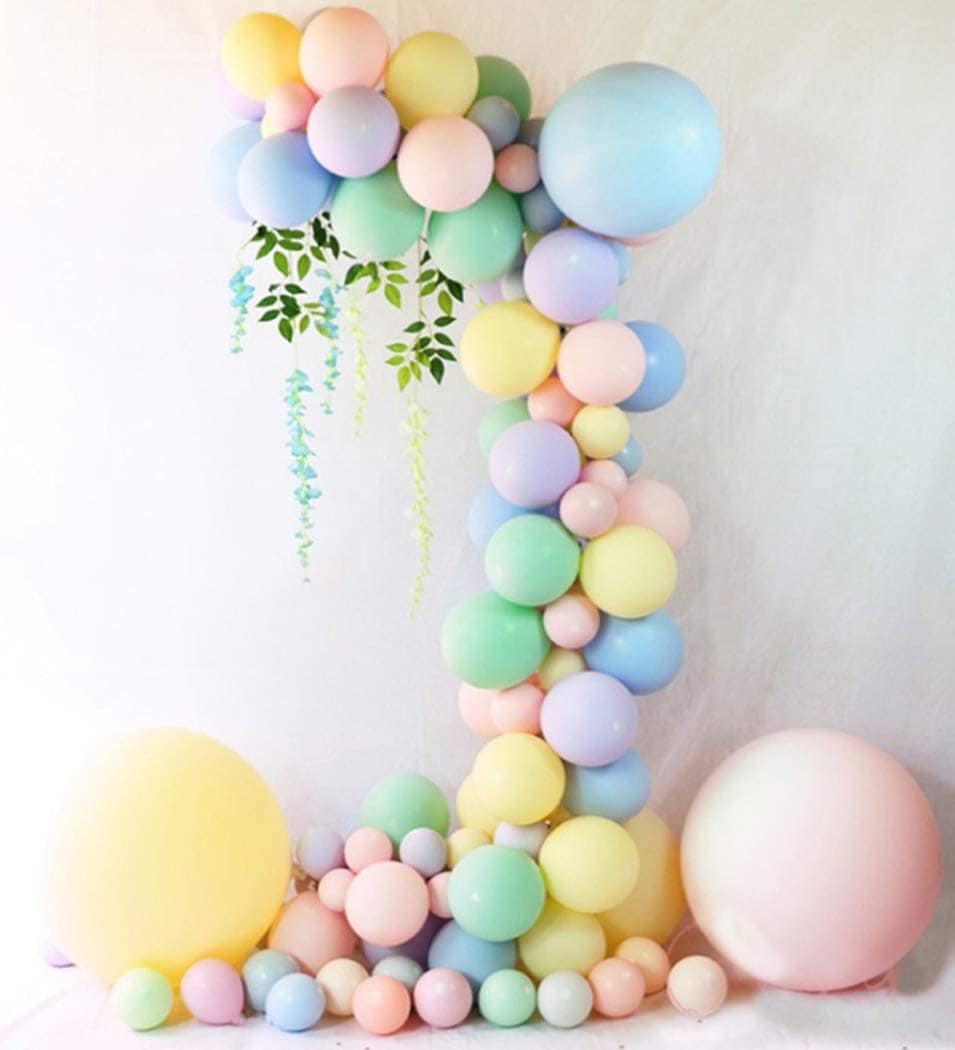
In our opinion, this is the best part! The combinations are endless here too, and this is the time to let your creativity flow! Even if you’re not the one creating the designs, you can research styles and find the design that appeals to you most, or even use them all! There are a few basic styles that anyone can try such as a garland, cluster, or column. We are always feelin’ crafty at Elle, so let’s jump in and show you how to make a quick DIY garland!
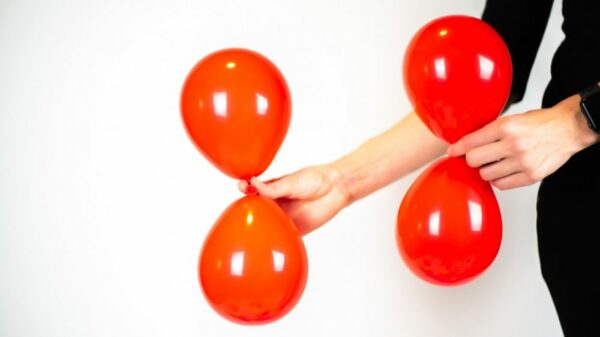
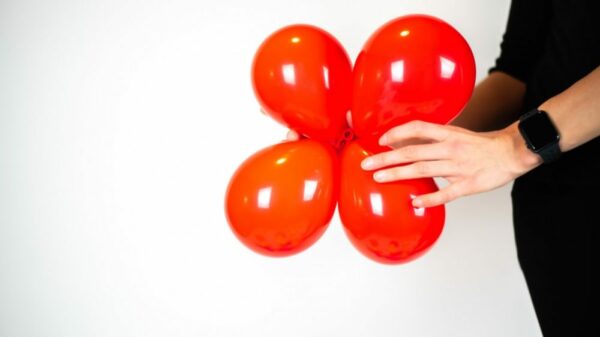
A garland starts with a very simple technique: Underinflate two 11” or 12” balloons of the same size and tie the necks together. (Tip: A basic balloon inflator is less than $30 on Amazon and will make life a lot easier!) These two-tied balloons are called deuces. Repeat the deuce process multiple times. Place one deuce on top of the other and twist one balloon from each deuce around the other two times. You now have the beginning of your very own garland! This is called a quad cluster. Continue tying deuces, twisting them together until you have lots of quads. (Yep, they’ll be all over your floor.) This next part takes a bit of smooshing, so remember not to overinflate your balloons.
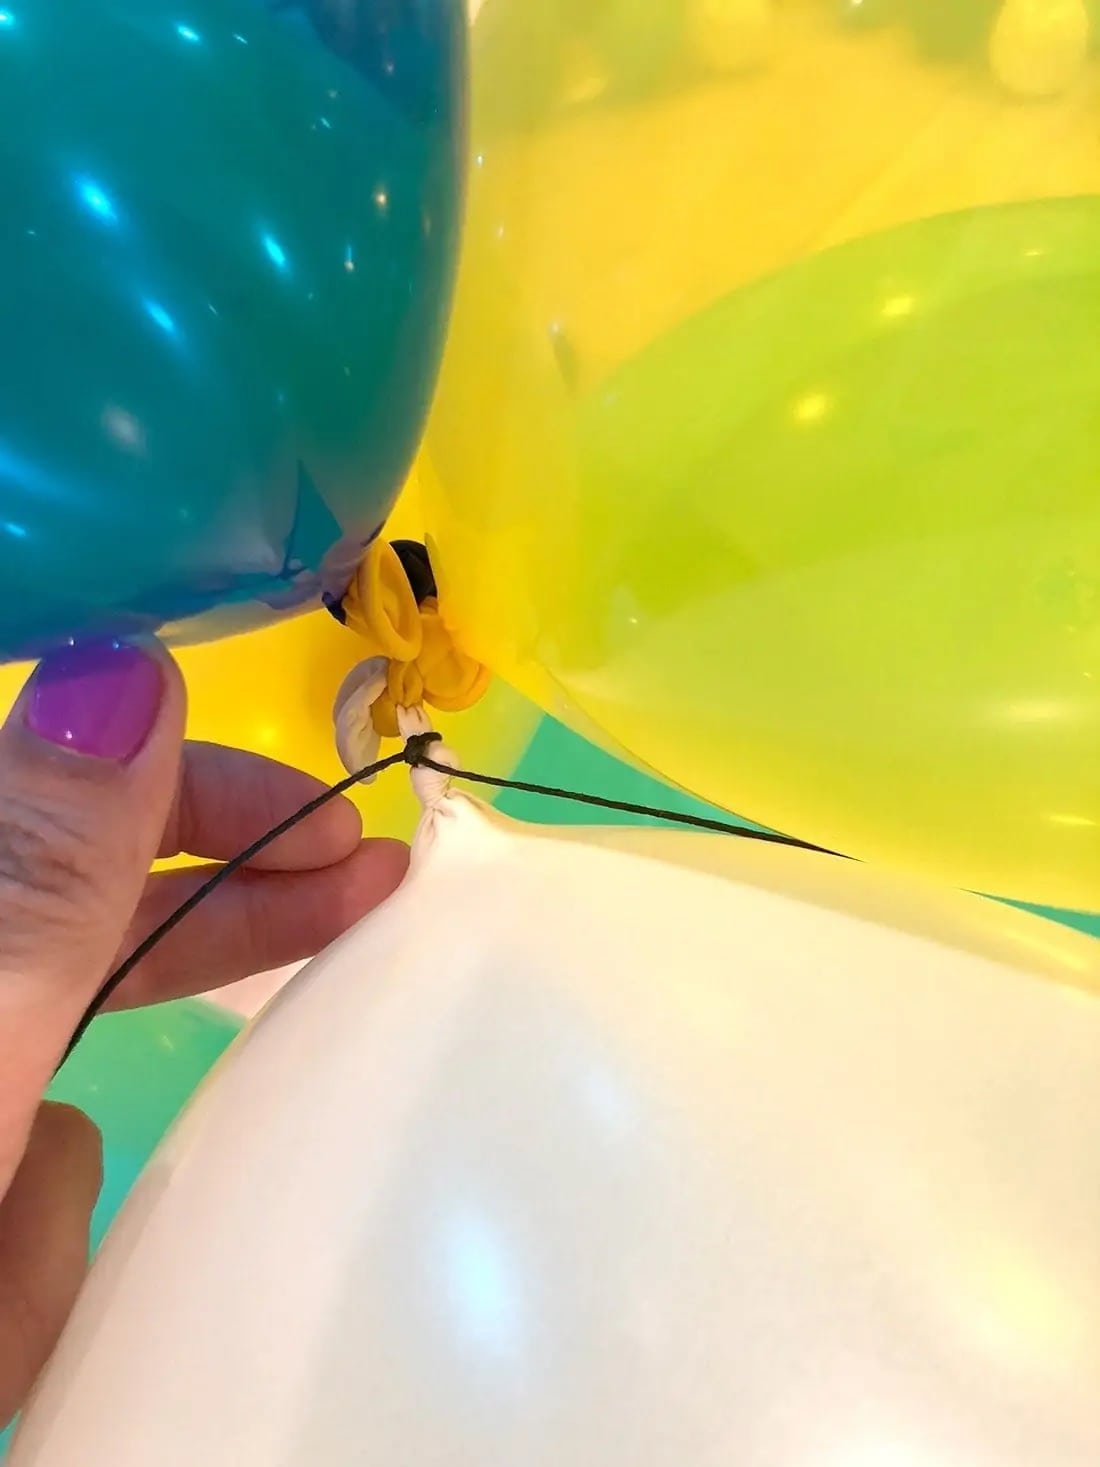
Next, let’s tie all the quad clusters together. Some people use fishing line or balloon tape, while others use 260 balloons (the super-skinny long balloons), cotton string, or even rubber bands for tying. It really comes down to personal choice. Take your ‘string’ of choice and tie a knot around the center of the necks of one quad, leaving lots of string for the length of the garland from the other end. Grab another quad, place it on top of your first quad. Take the string and make a figure 8 pattern between two balloons from each quad and back around the necks of the two quads two times. Continue this technique of adding quad on top of quad, weaving the string in a figure 8 pattern twice until your garland is the length you’re aiming for. You can tie in clusters (quads or deuces) of smaller 5” balloons in between areas of your garland for depth and dimension. There you have it! You now have a gorgeous garland. Add some flowers for accents, or whatever your heart desires! Don’t be afraid to think outside the box!
Set up
For wall garlands specifically, Command Strips are great, but can be damaging to some surfaces. Make sure to test your walls first! (Tip: Placing a piece of blue painters’ tape on the wall underneath the Command Strip placement first is a great alternative to sticking the strip straight to the wall.) Time to use your original tying material of choice and anchor the garland to your Command Strip hooks. For arches and stands, zip ties will be your best friend. We never leave without them! Don’t forget to look around you for areas or structures to anchor your garland. Using bannisters or even locking the end of a garland in a window is not uncommon practice, but make sure it’s safe to do so.
Breakdown
Some of us love this part, while others cringe at the thought of tearing it all down. Alas, it must be done! For most people, scissors work just fine. They allow you to pop the balloons and cut away your tying material. Latex balloons are biodegradable, but your Mylar or foil balloons are not as easily recycled. Be sure to dispose of all balloons properly and recycle when possible. Keep any props such as flowers, accents, or signs for next time! Great job!